 |
Day 68 - Excitedly moving beyond the framing, first (Tyvek) layer over the OSB sheathing prior to the stucco application.
|
 |
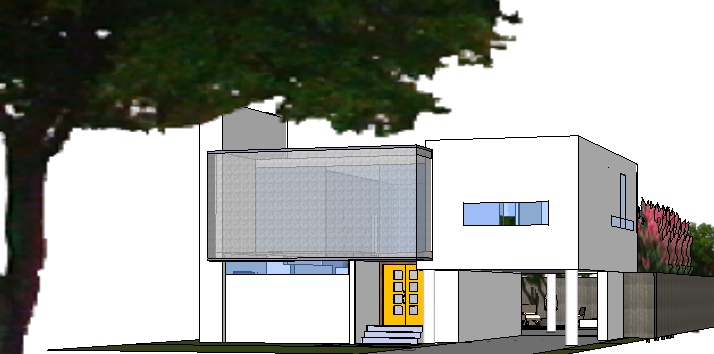
Day 67 - Framing is essentially complete; the framing of the kitchen windows that double as counter backsplash is defined. (See computer image below).
|
 |
Kitchen design doesn't require tiled backsplash due to use of windows.
|
 |
The side windows of the house (such as the kitchen windows shown above) will have this textural pattern (a standard known as "Pattern 62") so that we're not eyeball to eyeball with our neighbors - and it alleviates us from having to figure out curtains/drapes.
|
 |
Day 67 - Speaking of windows, the north-facing master bedroom framing shows the size of window unit. Window delivery is scheduled for next week!
|
 |
Day 64 - Final application of the TPO roofing membrane. The less heat absorbent white color assists cooling efficiencies.
|
 |
Day 63 - Installation of the roof decking insulation board.
|
 |
Day 62 - The roof has just been delivered in the form of buckets, rolls and sheets.
|
 |
Day 62 - Mario and our great framing crew fixing my oversight.
|
 | |
|
 |
Day 60 - It occurs to me that at times like this a truck would be awesome!
|
 |
Computer model image showing the light shelves/fur down in the clerestory. The shelf will hold lights that project upwards, filling the raised section with light at night, illuminating the center of the house and stairway.
|
 |
Day 58 - Similar angle photo of the raised section (raised 4' - 8" above the 10' second floor ceiling). The red marker lines in the close-up below illustrate for the framers how the shelf meets the adjacent wall (adjacent wall shown in blue in photo above).
|
 |
Day 58 - Projecting the light shelf fur down construction details on the wall (making sure that I want what I'm asking for).
|
 |
Day 58 - More fur down construction detail input. Since our framing team doesn't really speak english, I find it most effective to sketch out the solution.
|
 |
Day 58 - Marking fur downs for the framers since they are somewhat judgement calls regarding size.
|
 |
Day 57 - My onsite cubical. :)
|
No comments:
Post a Comment