Sunday, July 1, 2012

Thru Day 127

Day 128 - Three Collared Doves inside wondering what's been going on? All I can say is that it has been a "ROUGH" month. If you are not into details wait for the next post when we should be into sheetrock and late stages of stucco. Recently its been about rough-in installation (the stuff in the walls) and multiple inspections; HVAC, Electrical, Plumbing, Refrigerant, Fireplace, Framing and Lath Nail Pattern.

Day 125 - The green (passed) inspection sticker for the Wine Cellar's refrigerant lines, the red tag (failed) for the HVAC system. The HVAC sub reported to me that "we have a few corrections to be made..."
Day 117 - The Evaporator portion of the Wine "Closet's" Split System. When planning the layout I knew it was such a tight fit that we had to request the factory modify the access cover so that the refrigerant "line set" can be accessed once installed. 
Day 110 - Another "Lesson Learned" (if ever doing this again...). In retrospect, there was never realistic sizing of the mechanical closets for the HVAC systems during the design phase of the project other than "approximations." This location, now occupied by two of the three air handlers (heat pump systems), was intended to be either an extra kitchen pantry or a hall closet.
Day 105 - Electrical, Pluming and HVAC competing for space.
Day 105 - Guess which one is 1 5/8" narrower? Window (on the left) was framed in too large and as it opened there was an interference with the siding (stucco). Anyone want a window?
Day 100 - HA! The low voltage "quote" from Best Buy's Magnolia Theater / Geek Squad.  Scope included indoor and outdoor speakers, home theater surround sound, 4 TV locations, remote monitoring, security cameras & alarm, lighting controls.
Day 100 - A local family owned business, PAV Installations, met the low voltage "spec" for less than 20% of Best Buy's quote. PAV's system is as robust and "future-proof" as what BB proposed. PAV was also complete with their rough-in effort within a week of quoting it.     
Day 95 - One day while the framing carpenters were away on another project I decided to cut extra blocking for cabinets and some other last minute fur down changes I created. While I was using the handsaw, the electrician was working on the first floor below and yelled up "what, are you Amish or something?" 
Day 89 - Here is the biggest single "challenge" encountered so far (#^$%(*^@!!!). The beam you can see here was oversized by 2" (too tall). It should NOT have been above the front balcony decking (the plywood). Compounding the problem, the architect left the balcony slope out of the elevation dimensions. This problem required everyone involved to get out of denial (me included) to finally face it and solve it. Since there is literally only 1 3/16" to work with it required a solution that provides both slop and be the final cosmetic surface. I found a specialty product, www.westcoat.com/alx-p-6.html to do the job.

Day 117 - A screen capture of the sloped deck model I built in SketchUp so I could provide the framer dimensions appropriate dimensions.

Day 120 - Sucking it up, ripping out the deck and placing sloped stringers for the new deck.
A sample of the Westcoat ALX system. Sort of like "elasticized stucco."
Finally, 4 weeks later the balcony "lesson," is behind me. The final top coat (color) cosmetic layer will be added later.
The location of the central "scupper" where about 1/4 of the roof's rainwater will drain. The water will fall into a yet-to-be designed landscape feature in the front yard.
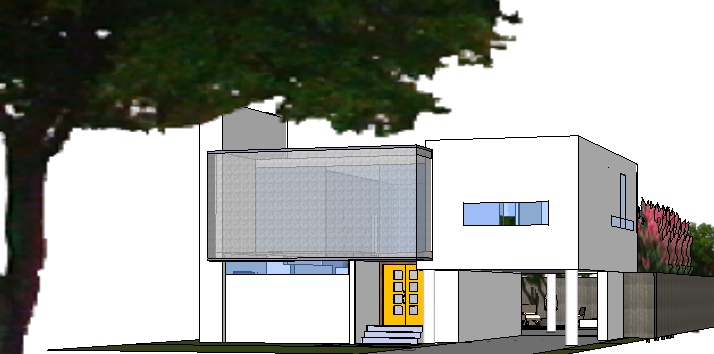
Day 120  With the balcony problem solved, the stucco now moves forward. Here the fireplace wall comes into the living room and the suspended hearth is now framed in.


No comments:

Post a Comment